To begin, a mash ton is a vessel that you use to extract the sugars from the grains used to make beer. In all cases a mash ton steeps the grain at temperatures anywhere from 100-160F. A mash ton is either heated directly to
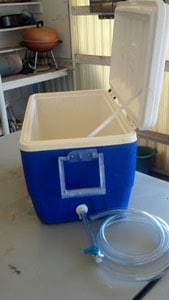
How to build a mash tun out of a beverage cooler. This is a general guide because depending on the cooler you use there could be some differences in how you attach the hose. Minor adjustments might need to be made here and there but all in all it’s a cheap and easy way to make a mash tun for your all grain brewing needs.
To begin you will need to do some shopping. You will need:
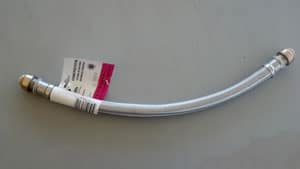
An 18 inch steel braided pluming hose.
Three feet of ¾ X ½ inch clear vinyl tubing
One foot of ½ X 3/8 inch clear vinyl tubing
Four 2 inch hose clamps
One small half inch hose clamp
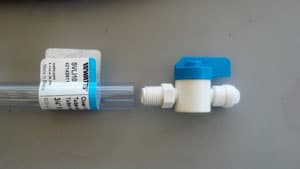
A valve with roughly ½ inch ends
Some Teflon tape (if needed)
A fifty quart cooler (new, used) with a drain.
You will also need a couple tools:
Dremel with a metal cutting bit.
Pliers
Crescent wrench
Screw driver.
Some of the pieces you will need
Some of the pieces you will need
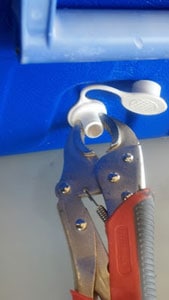
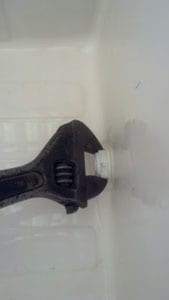
The first step is to remove your drain from the cooler. Some of the drains are a little tight so a wrench and pliers are helpful to break it loose.
Removing The Cooler Drain
Next take a five inch piece of the smaller tubing and fit it into the drain whole. This is the tricky part. Drains are usually very similar in whole diameter but the difference can mean that your tube will fit loosely or nice and snug. Mine fit a little loose so I wrapped some Teflon tape around it to make a water tight seal.
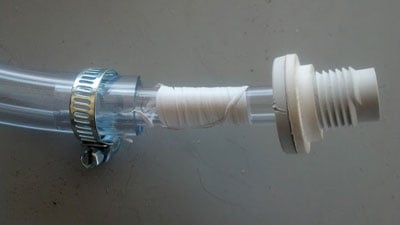
Reinstall the drain with the small hose sticking out equal distance on each side. Cut a six inch piece of the larger hose, slide it onto the smaller hose on the outside of the cooler and use a hose clamp to secure it.
This is the piece you will have to fit into the cooler drain hole
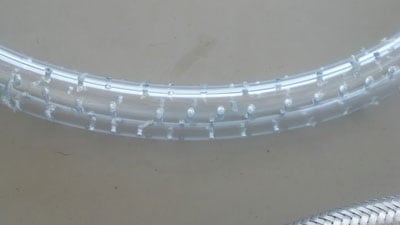
Next take a piece of the larger tubing that is one inch shorter than the stainless steel mesh covering the plumbing hose. You will need to either drill some holes in the tube every ¼ inch or cut slits down the length of the tube. Make the cuts about ¼ inch apart on all side of the hose.
The goal here is to make the hose porous but still strong enough to give the steel hose some structure. The steel mesh will do the filtering but isn’t strong enough and will flatten under the weight of the grains.
Larger tubing with holes in it
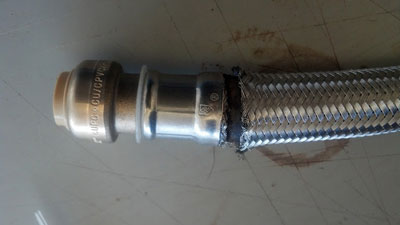
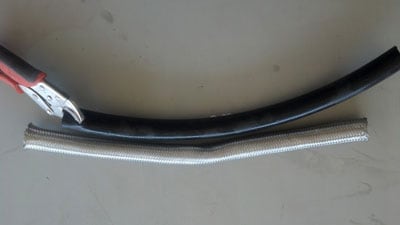
The Easiest way to get the steel off the hose is to cut it along the crimp with a dremel tool. Once you’re through the steel you can cut the black inner hose with a razor blade or strong scissors. The hard part is sliding the mesh off of the black hose. It resembles a Chinese finger trap like when you were a kid and can get rather frustrating. If you wet the hose with water, it will slide off much easier. You will have to be patient and work the mesh off slowly.
Steel hose cut with dremelRemoving the steel mesh
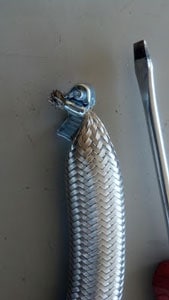
Once you have your braided hose off, slide it over the perforated nylon hose. Leave a little slack on one end and clamp the end with the small hose clamp.
Clamping the end of the steel hose that has been slid over the porous rubber hose.
Try to stretch the braided hose until it covers the length of the nylon tube and slide on a larger hose clamp.
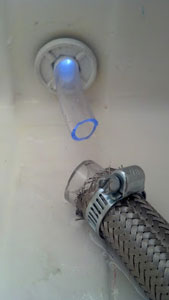
Now slide the larger nylon tube over the smaller one and clamp all three together with the hose clamp. Once you have this completed, fill your cooler with water and plug the exit hose to check for leaks. If some are found you may need to add more Teflon tape or tighten the drain pieces.
Fitting the steel and rubber hose over the drain hose
All that is left is sliding each end of the valve into the larger hose and clamping them down. One end to the six inch piece and the other to the remainder of the hose. You can adjust the length to whatever size fits your system. My valve had a male and female connection and I could not stretch the hose over the larger one. If you run into that problem you can heat it a little with a lighter to make it easier to slide it on.
Many people use this style mash tun and have great luck with it. I hope it works for you.