Cooling coil Build
This is a quick and easy way to make a cooling coil for under $30. This tool is to aid you in the important step of cooling the wort. It comes in handy when you are brewing the full volume of your beer and cannot add RO ice or cold water to cool the wort. The build takes 15-20 minutes and the only tools you need are a crescent wrench and a flat head screw driver.
- 20-25 feet of 3/8 to ½ inch copper pipe (larger is better but more expensive)
- A conversion connector from the pipe you buy to a garden hose fitting (if you have an indoor system and use the sink you will have to get a sink adapter instead of the hose adapter)
- 5-10 of nylon hose that fits over the copper pipe you bought,
- 3 small hose clamps
I used 20 feet of 3/8 inch copper pipe and 3/8 ID nylon hose for my cooler. The smaller pipe means less surface area therefore less cooling, but is less expensive. Now for the build.
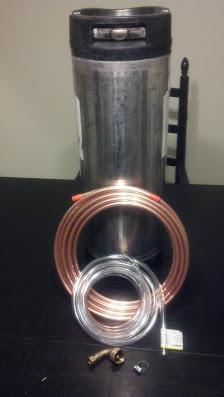
1. Find a cylinder to wrap your copper pipe around. If you have a Cornelius keg lying around they are perfect. If you don’t, Use something similar. If you don’t have that you can form it with your hands but this makes it a little harder to make the coil look pretty.
2. Uncoil the copper pipe enough that you have a few inched between each loop. And slide it over your form. Be careful not to crimp the pipe! The copper pipe bends easily and if you crimp it you could ruin the pipe. When you bend the pipe, grasp the pipe with both hands close together and take your time bending. Do not bend the pipe at too sharp of an angle, this increases your chance of a crimp.
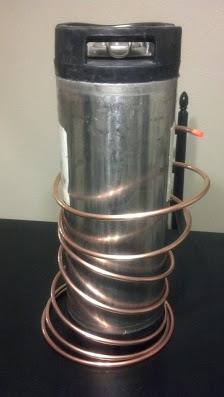
3. Take the end of the pipe closest to the top of the coil and bend it up. leaving a piece 12 inches long standing straight above the coil.
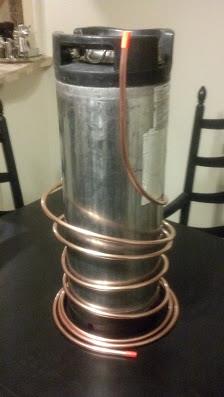
4. Now wrap the rest of the pipe tightly around the form other than the last 18 inches.
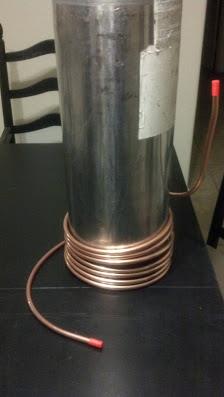
5. Expand the coil leaving about 2 inched in between each rung. When the coils are expanded bend the bottom end of the pipe up until it is even with the top end of the pipe. Make sure you don’t bend the pipe at too extreme of and angle so you don’t crimp it.
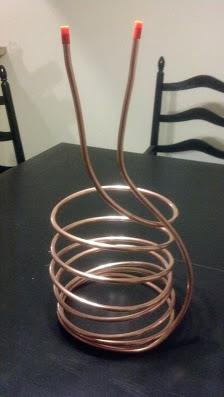
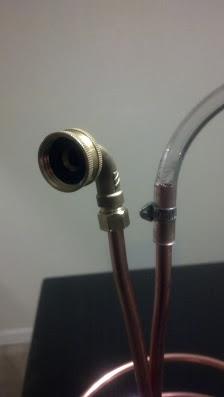
6. Take the hose connector and remove the nut, inside it is a small sleeve. Slide the nut then the sleeve a half inch down one of the pipe ends. While holding the nut on the pipe with the sleeve inside it, take the hose connection end and thread it onto the nut. With the crescent wrench tighten the nut until the hose connector is firmly connected to the pipe. Also slide on the nylon tube a couple inches to the other pipe end with a hose clamp and tighten the clamp.
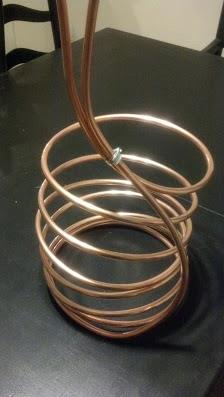
7. Take another hose clamp and connect is near the coils below the copper pipe ends near the top of the coil. This is done to add more stability to the pipe.
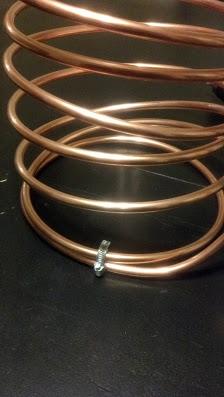
8. Attach another hose clamp behind were the lower pipe end starts to bend to the top, to the bottom rung of the coil. Again, this is done for extra stability.
9. Fix any ugly coils and you’re done.
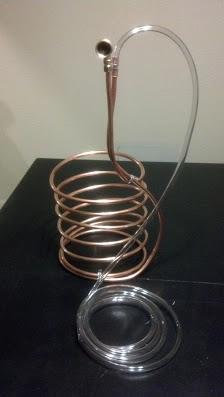
Tip: This cooling coil is great to run a hose into. You can also build & attach a hose connection right onto your cooling coil if you wish.
To use the coil, hook up the end to a hose, put the clean and sanitary coil in the hot wort you brewed and run the nylon hose to a good place to drain. Some people water their plants with the drain water. Turn on the hose and you’re now cooling your wort! I hope this build works for you and thank you for reading.

