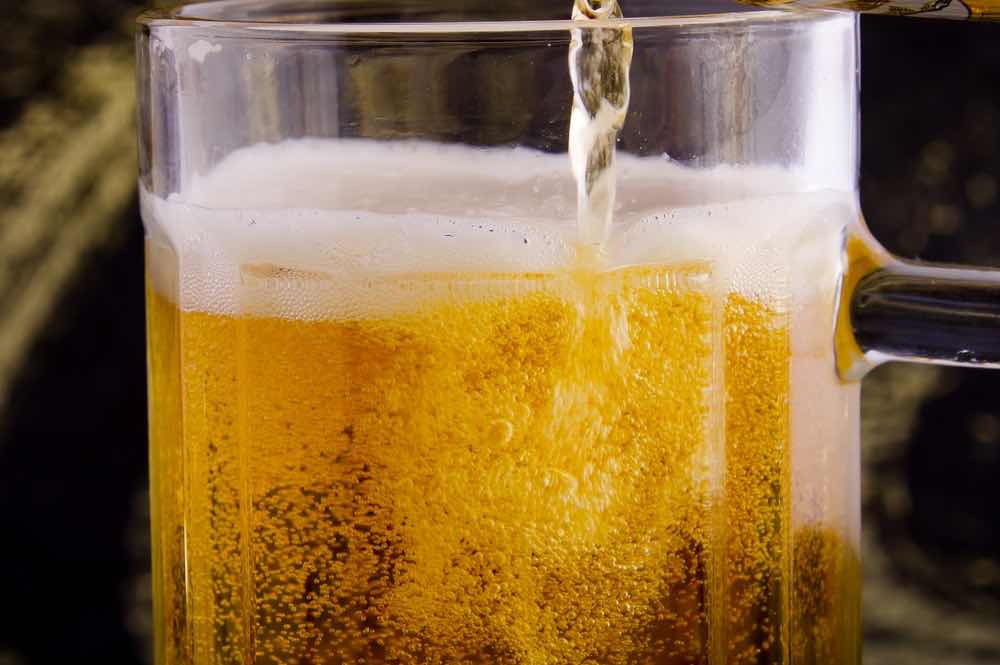
Force carbonating beer is an efficient method used by homebrewers and professionals alike to speed up the carbonation process while maintaining precise control over the final product. By directly infusing Carbon Dioxide (CO2) from a cylinder into the beer, brewers can achieve consistent results and reduce brewing times. This technique provides an alternative to traditional natural carbonation methods, which rely on leftover yeast consuming additional sugars to create CO2 and can take several weeks to complete.
Key Takeaways
- Force carbonation is a popular, efficient method for carbonating beer quickly and consistently.
- Different techniques and equipment setups cater to each brewer’s preferences and requirements.
- Proper calculations and safety measures are essential for successful force carbonation.
Force Carbonating Beer Basics
Carbonation Process
Force carbonating beer involves infusing CO2 (carbon dioxide) gas into the beverage, resulting in a faster carbonation process than what’s achieved through traditional bottle-conditioning. When brewing beer, carbonation adds fizziness, enhances the beer’s aroma, and contributes to a desirable mouthfeel. Force carbonation ensures consistent results and accelerated brewing times, as it can turn around beer in 24 to 48 hours, compared to the one to three weeks required for bottle-conditioning.
Force Carbonation Methods
There are two primary methods for force carbonating beer:
- Set and Wait: This method is suitable for those looking to force carbonate their beer in the shortest time possible. To utilize this method, chill the beer to around 38°F (3°C), connect it to a CO2 tank, and set the regulator to the desired pressure based on a carbonation chart. Leave the beer and CO2 connected for about five to seven days, periodically shaking the keg to help the gas dissolve into the beer.
- Burst Carbonation: This method is for those who want to force carbonate their beer even faster. With the burst carbonation method, the regulator is set to a higher pressure than normal (usually around 30-40 PSI) for 24 hours. After this time, the pressure is reduced to serving levels and the keg should be vented to release excess CO2. This method has a higher risk of over-carbonating, so it’s important to monitor the pressure and adjust accordingly.
Both methods require the use of a CO2 tank, regulator, and proper connections to a keg. No matter the method chosen, temperature remains a crucial factor, as CO2 dissolves more efficiently in colder beer. Therefore, chilling the beer to around 38°F (3°C) will yield optimal results.
Equipment and Setup
Kegs and Kegerators
When force carbonating beer, it’s essential to have the correct equipment. For homebrewing, a 5-gallon Cornelius (Corny) keg is recommended, as its wide opening allows for easy cleaning and filling. These kegs have been used by homebrewers worldwide and are considered the gold-standard for kegging homebrew beer. A kegerator is needed for storing and dispensing your carbonated beer at the appropriate temperature.
Regulators and Pressure Gauges
To control the pressure during force carbonation, you’ll need a gas regulator and pressure gauges. A gas regulator connects the CO2 cylinder to the gas line and helps maintain a stable psi (pounds per square inch) while carbonating. Pressure gauges are used to monitor the CO2 pressure in the system, allowing you to make adjustments as needed. Some regulators come with built-in pressure relief valves for safety.
Gas Cylinders and Lines
A full CO2 cylinder is required for force carbonating your beer. To connect the gas cylinder to your keg, you’ll need a gas line and appropriate fittings. Ensure that the gas line is clean and free of leaks to prevent any loss of CO2 during the force carbonation process. Additionally, you’ll need a liquid line that connects the keg to your kegerator for serving the carbonated beer.
When force carbonating, consider the following factors:
- Temperature: Keep the keg at a consistent, cool temperature within your kegerator or fridge.
- Pressure: Set the serving pressure on your gas regulator based on your desired CO2 volumes.
- Force carbonation methods: Choose between the “set and forget” method or the “shake and roll” method, each with its own benefits and drawbacks.
- Monitoring: Regularly check the pressure gauges and adjust as needed to ensure proper carbonation levels.
By assembling the proper equipment and carefully monitoring the force carbonation process, you can achieve optimal carbonation levels for your homebrew beer. The right keg, regulator, pressure gauges, gas cylinder, and lines will help make force carbonation a successful and enjoyable experience.
Carbonation Techniques
Set It and Forget It Method
The Set It and Forget It method is a popular technique for force carbonating beer, providing consistent results with minimal effort. In this approach, the beer is placed into a Cornelius (Corny) keg, which is then connected to a CO2 tank. The CO2 pressure is set according to the desired carbonation level using a pressure gauge, typically between 10-12 PSI.
This method relies on maintaining a consistent temperature, usually around 38-40°F (3-4°C). It is essential to ensure that the temperature remains stable to avoid over-carbonation or uneven results. The Set It and Forget It process can take anywhere from 5-14 days to fully carbonate the beer, depending on the desired carbonation levels and temperature. This method is a more natural carbonation process compared to other force carbonation techniques.
Shake Method
The Shake Method is a faster approach to force carbonate beer, requiring more active involvement from the home brewer. For this method, connect the Cornelius keg to the CO2 tank and set the pressure to around 30 PSI. After ensuring the keg is adequately sealed, gently shake the keg for approximately 20 minutes while carefully monitoring the CO2 volumes.
Shaking the keg helps to dissolve the CO2 into the beer more quickly, decreasing the overall carbonation time compared to the Set It and Forget It Method. While effective, the Shake Method may not provide as consistent results, and extra care must be taken to avoid over-carbonation.
Burst Method
The Burst Method is another technique to quickly force carbonate beer. In this approach, the CO2 pressure is set at a much higher level than normal, usually around 30-40 PSI, for a short period. This high-pressure carbonation process typically lasts for 12-48 hours, depending on the desired CO2 volumes.
Once the specified time has elapsed, the pressure is reduced to serving levels, and the beer is allowed to settle and stabilize for an additional 24 hours. It is crucial to monitor the carbonation chart during this process to achieve the desired CO2 levels and prevent over-carbonation.
When using any of these methods, ensure that the keg system and its components, such as disconnects and tubing, are properly sanitized and set up before proceeding. Additionally, using a force carbonation calculator can be helpful in determining the ideal pressure and time for optimal results. The desired carbonation level will vary depending on the beer style and personal preferences, making it essential to experiment and refine the process to achieve the perfect carbonation for each unique brew.
Carbonation Charts and Calculations
PSI and Temperature Requirements
A crucial aspect of force carbonating beer is maintaining the proper pressure and temperature. The pressure, measured in pounds per square inch (PSI), correlates directly with the desired CO2 volume in the beer. Additionally, the temperature at which the beer is force carbonated affects the amount of CO2 that can dissolve into the liquid.
A carbonation chart comes in handy in determining optimal temperature and PSI values to achieve the desired volumes of CO2. This chart depicts a range of values, such as:
| Temperature (°F) | 5 PSI | 10 PSI | 15 PSI |
|---|---|---|---|
| 30 | 2.23 volumes | 3.11 volumes | 3.77 volumes |
| 35 | 2.02 volumes | 2.91 volumes | 3.57 volumes |
These values guide the homebrewer on how to adjust their force carbonation settings for the best results.
Carbonation Levels for Beer Styles
Different beer styles require different levels of CO2 volumes to meet their specific characteristics. A force carbonation calculator helps determine the ideal carbonation levels for each style. Some common carbonation levels for different beer styles are:
- Under-Carbonated: 0 – 1.49 volumes CO2
- Stouts and Porters: 1.50 – 2.19 volumes CO2
- Lagers, Ales, Ambers, most beers: 2.20 – 2.59 volumes CO2
- Highly carbonated ales, Lambics, Wheat beers: 2.60 – 4.0 volumes CO2
- Over-carbonated (except for certain specialty ales): 4.01+ volumes CO2
Paying close attention to the carbonation levels will ensure the beer maintains its intended characteristics and avoids being too bubbly or flat. Remember to consider factors like the temperature and desired CO2 volume when force carbonating your homebrew.
Carbonation Safety and Troubleshooting
When force carbonating beer, it is important to ensure safety and prevent any issues that may arise during the process. In this section, we will discuss some crucial safety and troubleshooting topics, including checking for leaks, the importance of a diacetyl rest, and proper filling and purging procedures.
Checking for Leaks
One of the main concerns when force carbonating beer is potential leaks in your equipment. These can lead to a loss of CO₂ and affect the carbonation process. To check for leaks, apply a mixture of water and a mild soap or brewing sanitizer to the connections and fittings in your kegging setup. You can use a spray bottle to make the process easier. If there are any leaks, you will see bubbles forming at the source. Ensure all ball-lock fittings are tight and secure to avoid this issue. In addition, check the regulator, pressure gauge, dispenser, and dip tubes, as well as any ball lock conversion kits you may be using.
Diacetyl Rest and Off-Flavors
When force carbonating, particularly with lagers, incorporating a diacetyl rest into your brew schedule can help prevent off-flavors. Diacetyl is a compound that can create a buttery taste in beer, which is generally undesired. A diacetyl rest involves raising the temperature of your fermenting beer for a short period, allowing the yeast to absorb and break down diacetyl.
Following the force carbonation process, it is essential to distinguish between off-flavors resulting from diacetyl and those caused by over-carbonation. The latter can be remedied by releasing excess pressure and allowing the beer to chill in the fridge.
Filling and Purging Procedures
Proper filling and purging techniques are vital to ensuring a successful force carbonation. First, fill the Cornelius keg with your beer, making sure to leave some headspace. Attach the CO₂ regulator to your gas cylinder and ensure the pressure is set correctly according to your desired carbonation levels. Before connecting the regulator to your keg, purge the headspace by pulling the pressure relief valve on the keg for a few seconds. This removes any oxygen, which can be detrimental to your beer’s flavor and shelf life.
When force carbonating using the burst method, it is helpful to begin at a high pressure, then decrease the pressure after a set period. Follow the appropriate force carbonation chart for your desired volumes of CO₂ based on your beer’s temperature during the carbonation period. Homebrewers should monitor the carbonation process closely and adjust the pressure as needed to avoid over-carbonation.
To serve your beer, ensure the keg is properly chilled and connected to your kegerator or dispensing system. Adjust the serving pressure according to your system’s setup and pour yourself a delicious, perfectly carbonated brew.
Frequently Asked Questions
How long should I force carbonate my beer?
Force carbonating beer can take anywhere from 1 to 7 days, depending on the method and desired carbonation level. The “set and wait” method typically takes 3 to 7 days, while the “shake method” can carbonate your beer within 1 to 2 days.
How do you force carbonate beer at home?
To force carbonate beer at home, follow these steps:
- Prepare your keg by cleaning and sanitizing the equipment.
- Transfer the beer from the fermenter to the keg.
- Seal the keg and connect a CO2 tank to the gas post.
- Set the pressure on the CO2 regulator to the desired PSI for your beer style.
- Choose a force carbonation method, such as “set and wait” or “shake method.”
- Allow the beer to carbonate for the required time, then adjust the pressure accordingly for serving.
What is the shake method for force carbonating?
The shake method for force carbonating involves agitating the keg while applying CO2 pressure. This accelerates the rate at which CO2 dissolves into the beer. To use the shake method:
- Set the CO2 regulator to the desired pressure.
- Connect the CO2 tank to the keg.
- Lay the keg horizontally, on its side.
- Agitate the keg by shaking or rocking it gently for 10-15 minutes.
- Allow the beer to rest for a few hours before serving.
Remember, the shake method can over carbonate your beer, so proceed with caution.
Which is the best force carbonation calculator?
The best force carbonation calculator will depend on your individual preferences and experience level. Several online tools and mobile apps can help you determine the ideal pressure and time for force carbonating your beer. Popular options include Brewer’s Friend and Keg Carbonation Calculator.
What are the benefits of using a force carbonation kit?
Using a force carbonation kit simplifies and streamlines the force carbonation process. These kits typically include all the necessary equipment, such as a CO2 regulator, keg connectors, and hoses. Benefits of using a force carbonation kit include:
- Faster carbonation, compared to bottle conditioning.
- Consistent carbonation levels across batches.
- Reduced risk of contamination compared to bottling.
Can I force carbonate cocktails and soda?
Yes, you can force carbonate cocktails and soda using a similar process to force carbonating beer. The main difference will be the pressure settings and time required for carbonation, as cocktails and soda may have different carbonation levels than beer. Follow the same basic steps, adjusting the process according to your carbonation preferences and beverage type.