Kegging beer has become an increasingly popular method for both homebrewers and professional brewers alike, offering convenience and efficiency in the beer storage and dispensing process. The process of kegging involves transferring the finished beer into a keg, where it can be carbonated and served directly from the keg itself. This method of beer storage has several advantages over bottling, such as ease of use, quicker carbonation times, and the ability to enjoy draft beer at home.
Key Takeaways
- Kegging offers a convenient and efficient method for storing and dispensing beer.
- Different types of kegs and equipment are needed for a proper kegging setup.
- Proper cleaning and maintenance of the kegging system ensure high-quality beer.
Kegging Basics
Kegging is a popular method among homebrewers for carbonating and dispensing their beer. This process involves transferring the beer from a fermenter to a keg, which is then pressurized with carbon dioxide (CO2) to achieve the desired level of carbonation.
Homebrewers typically use five-gallon stainless steel Cornelius (“Corny”) kegs for kegging. These kegs come in two types: ball-lock and pin-lock, which refer to the different types of connections for attaching hoses. A kegging system consists of a keg, a CO2 gas tank, a pressure regulator, and two hoses. One hose feeds CO2 gas into the keg inlet, while the other hose brings the beer from the keg to the tap.
Before kegging, it’s essential to sanitize your keg properly. You’ll need to disassemble the keg, soak the small parts, and fill the shell with sanitizer. This step ensures that no unwanted microorganisms enter your beer during the kegging process, potentially spoiling it.
When the keg is ready, transfer your beer from the fermenter to the keg. Be sure to avoid splashing as this can introduce oxygen, leading to unwanted off-flavors. Once the beer is in the keg, seal it and attach the gas line. Adjust the pressure regulator to the appropriate psi setting for your desired level of carbonation – different beer styles require different levels.
Carbonation time varies depending on the temperature and pressure used. Generally, higher pressures and lower temperatures lead to faster carbonation. Most homebrewers let their beer carbonate for one to two weeks, but some styles might take longer. Once carbonation is complete, you may start serving your beer using the tap connected to the keg.
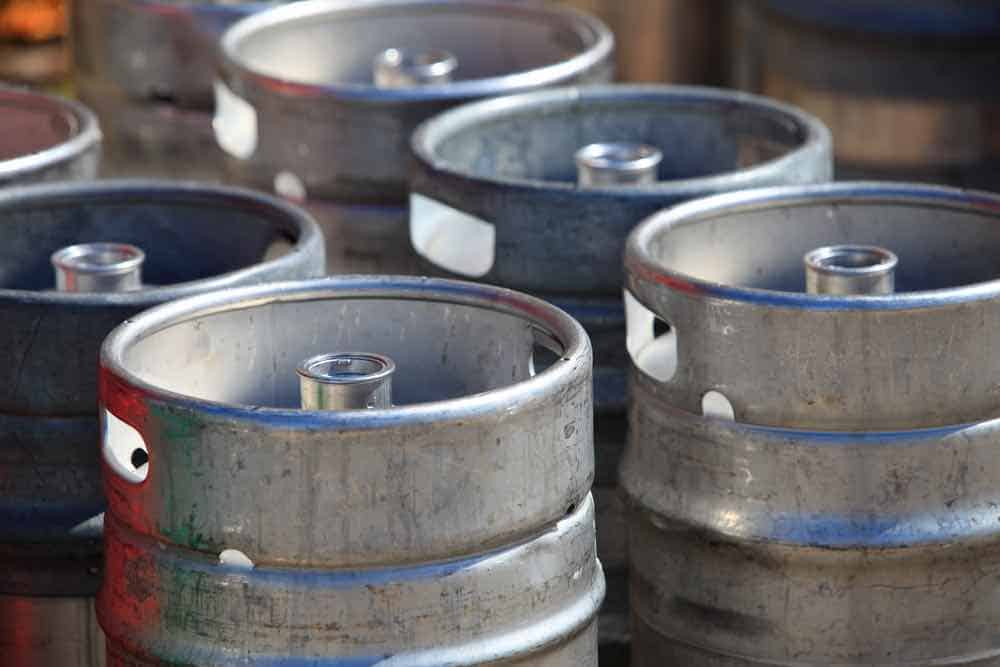
Types of Kegs
When it comes to kegging beer, there are various types of kegs to choose from. One common option is the Cornelius keg, also known as the Corny keg or Homebrew keg. These tall, cylindrical kegs are often used in home brewing, wine, coffee, and kombucha applications. Cornelius kegs have a capacity of 5.0 gallons or 640 ounces and dimensions of 23″ x 9″. They are available in two connector styles: ball-lock and pin-lock.
Ball-lock kegs and pin-lock kegs are quite similar, but there are small differences that set them apart. Ball-lock kegs utilize a ball locking mechanism to secure the connections for gas in and beer out. This option is popular among homebrewers for their ease of use and reliability.
On the other hand, pin-lock kegs use a pin locking mechanism to ensure secure connections for gas and beer lines. Although they are not as common as ball-lock kegs, pin-lock kegs can still be a viable option for those who prefer their unique locking mechanism.
When purchasing kegs, both new and used options are available. New kegs come directly from manufacturers and are guaranteed to be in pristine condition. They typically have a higher price point but offer the advantage of being free from any potential wear and tear or maintenance issues.
Used kegs can be a more cost-effective choice, especially for homebrewers on a budget. However, when purchasing used kegs, it’s essential to inspect them thoroughly to ensure they are in good working condition. Check for any signs of damage on the kegs, and make sure all seals are intact and functioning properly.
Beer Kegging Supplies
Ferroday Ball Lock Keg Disconnect
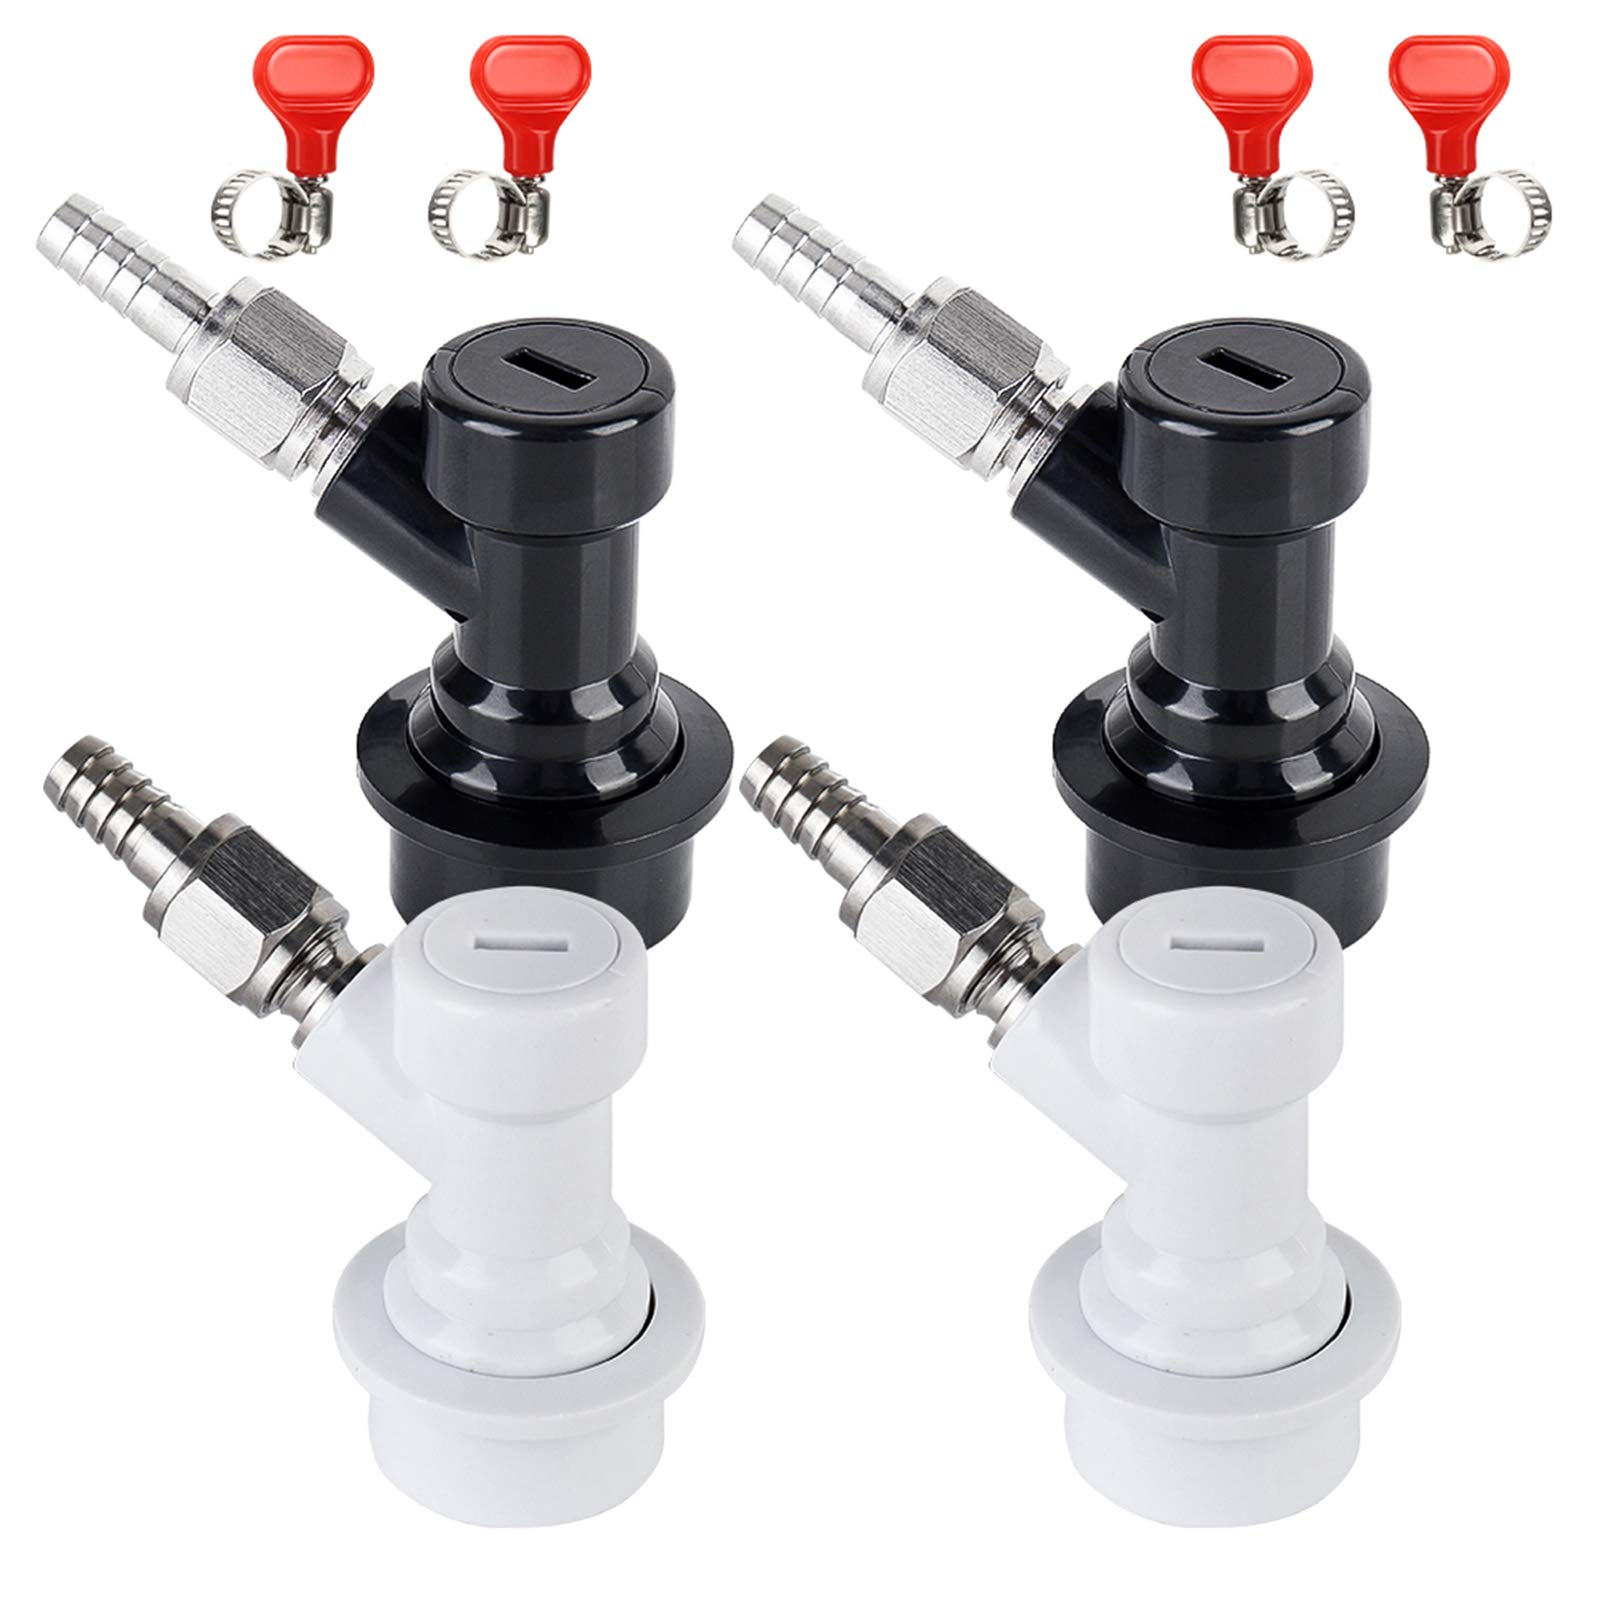
The Ferroday Ball Lock Keg Disconnect is designed for beer kegging enthusiasts who want a reliable and versatile way to connect their kegs with other equipment. This quick disconnect fitting is compatible with most ball lock homebrew kegs, ensuring a wide range of application possibilities for your keg system.
With both 1/4″ and 5/16″ barbs included, you can easily attach the appropriate hoses to your kegs for gas and liquid flow. The durable ABS and stainless steel materials ensure that these fittings are wear-resistant and corrosion-resistant – making them a great investment for long-term use.
Ferroday Dual Gauge Co2 Regulator Beer Kegerator
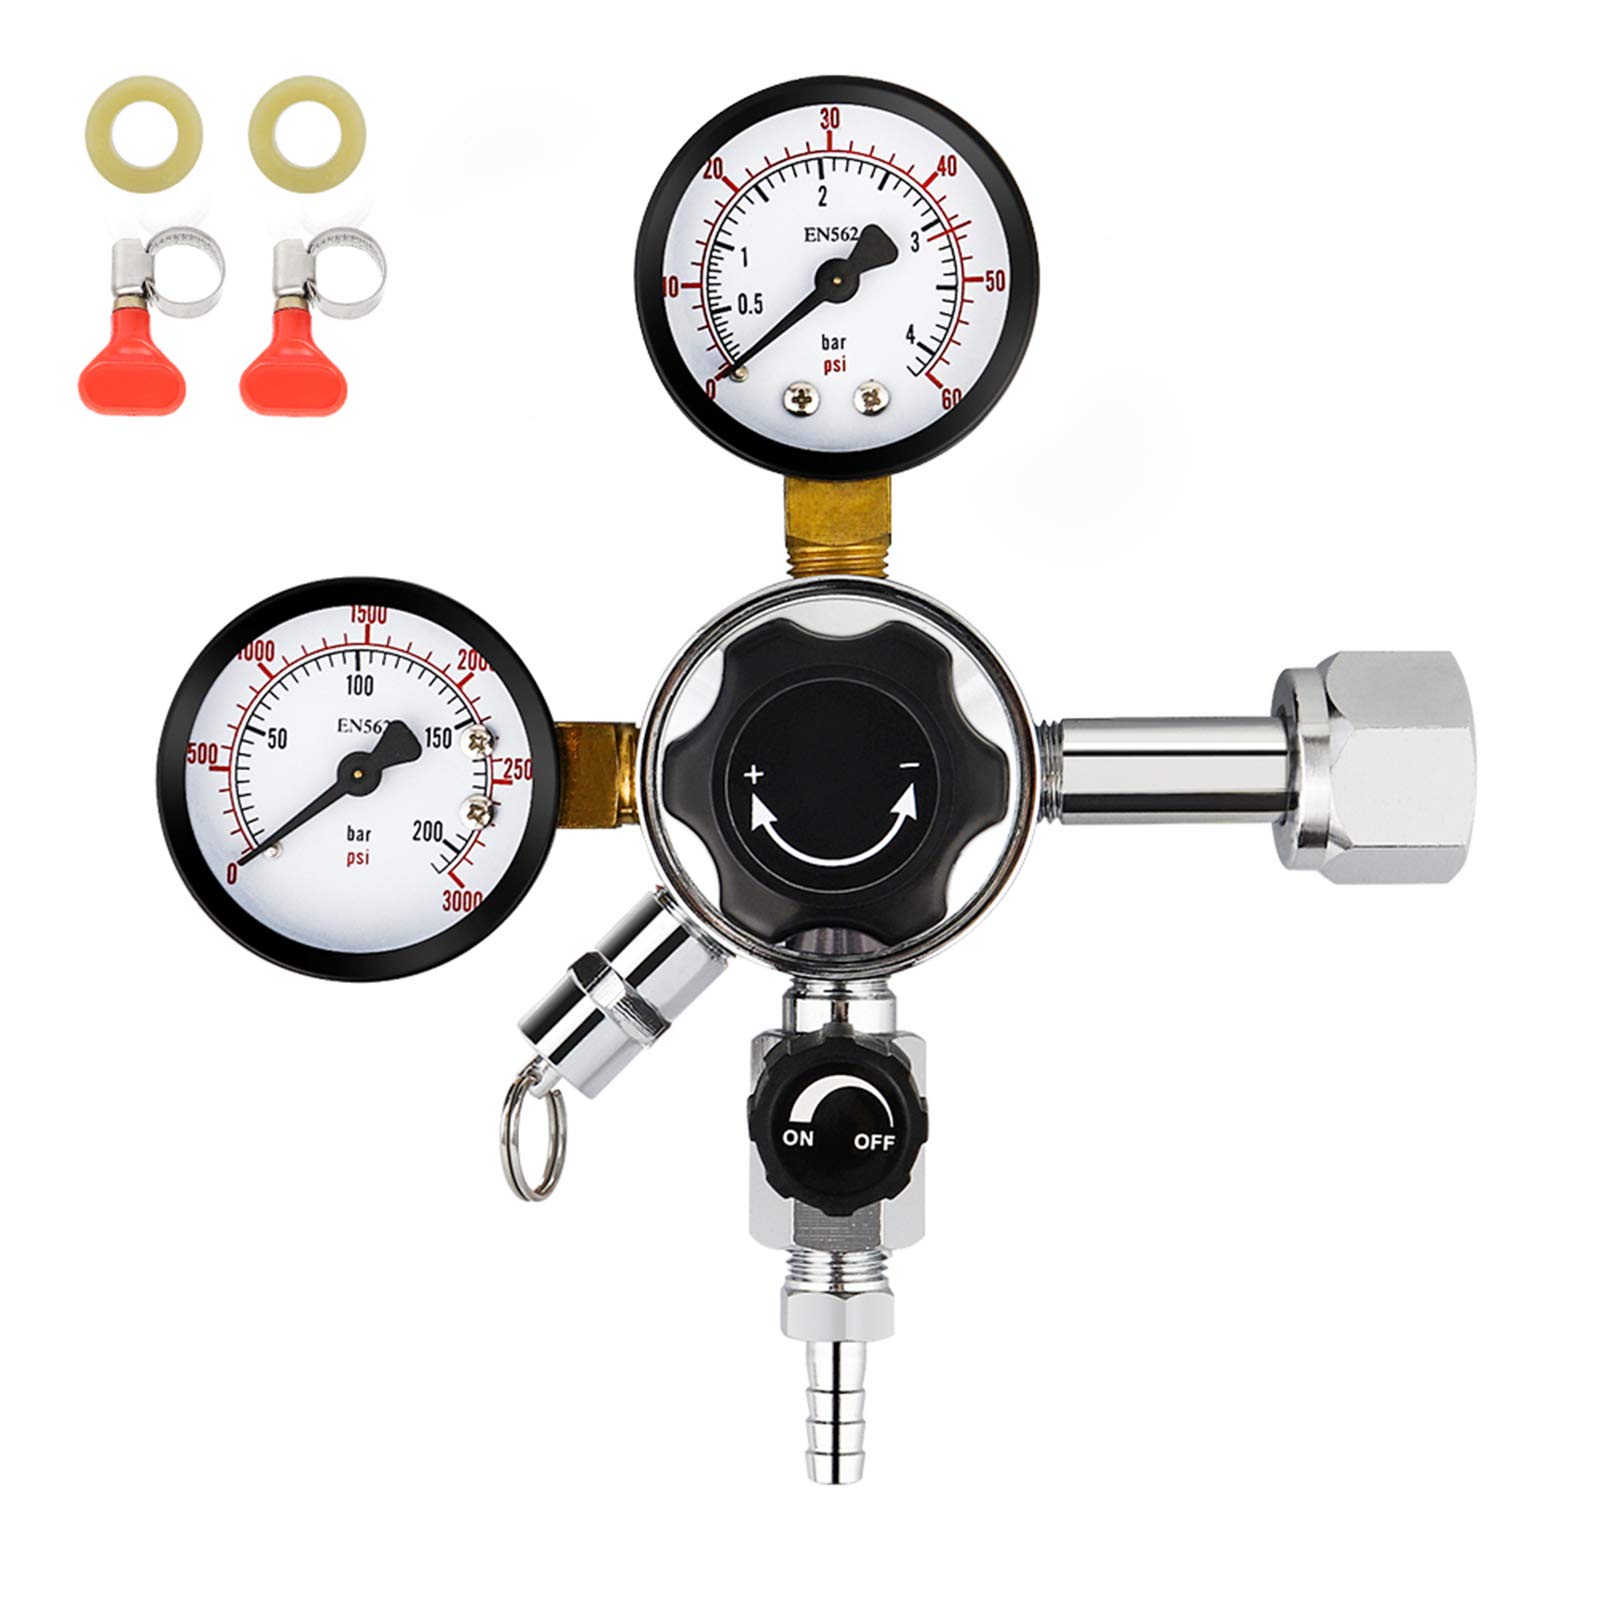
Craft your perfect pint with the Ferroday Dual Gauge Co2 Regulator, designed to make controlling pressure in your beer keg a breeze. This CO2 regulator features a heavy-duty forged brass body, well-made connections, and an expertly designed pressure release valve, ensuring no gas leakage for a worry-free brewing experience.
When it comes to adjustments, the Ferroday CO2 regulator stands out with its two control knobs. The large knob allows precise pressure control, while the smaller knob enables you to instantly shut off the gas without any liquid backflow. A lock ring secures your pressure setting, while the two big, clear gauges make it easy to monitor CO2 volume and output pressure.
GWENBHMTOOL Botting Bucket Spigot 1” Beer Brew Spout
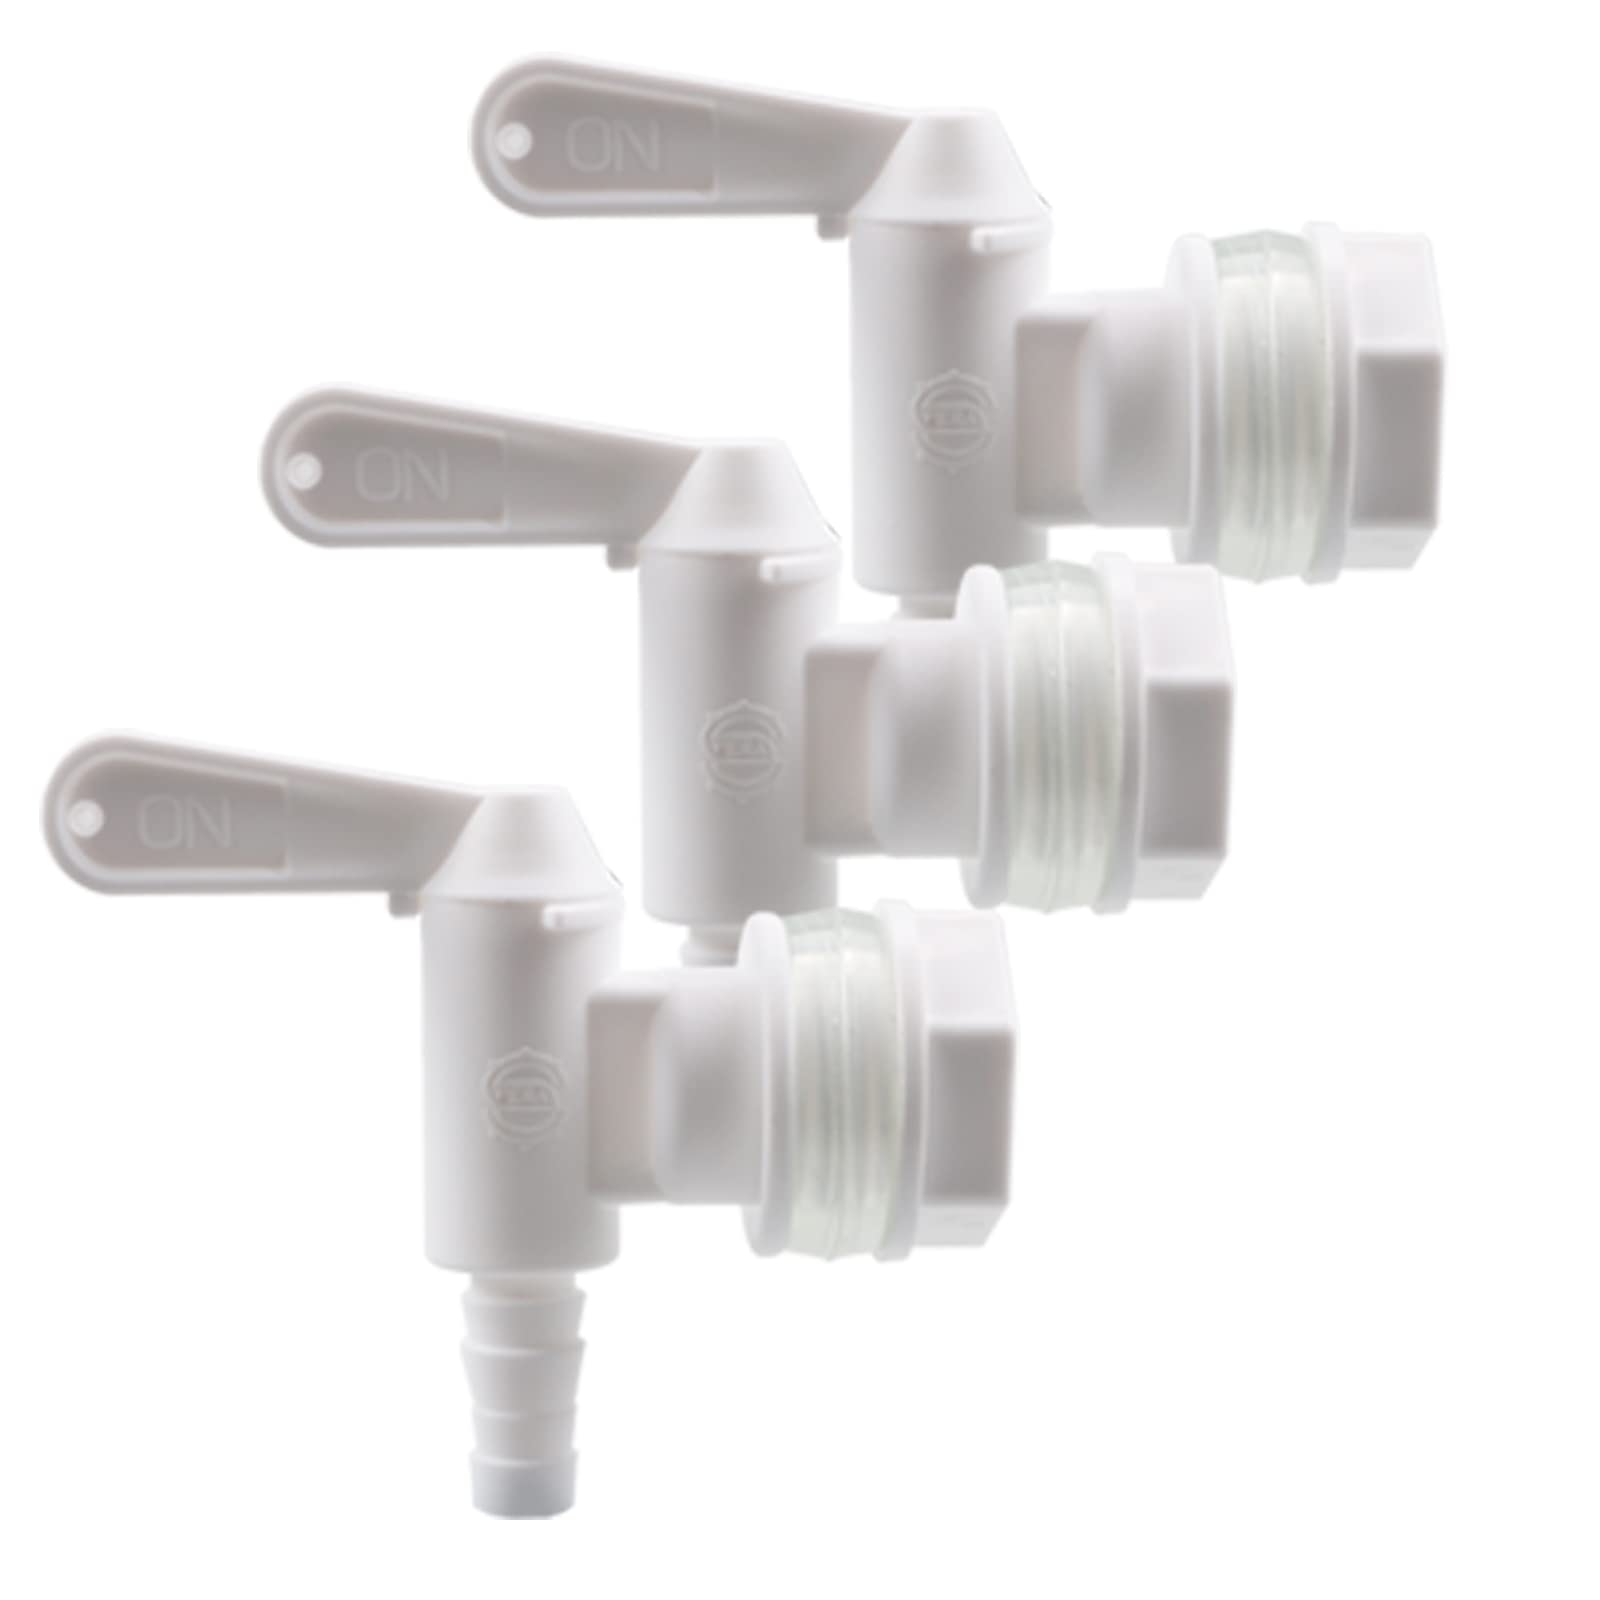
The GWENBHMTOOL Botting Bucket Spigot is a pack of three spigots designed for home brewing and wine making. Made from food-grade plastic, these spigots are lightweight yet sturdy, ensuring a long-lasting and safe solution for liquid transfer. The tapered spout on the spigot is designed to connect to a 3/8” ID hose for easier and more convenient liquid transfer.
These spigots are easy to install, requiring only a 1-inch hole and including silicone pads on both sides for a leak-proof fit. The spigots fit most buckets, making them a versatile addition to your brewing gear. Being detachable, they are simple to clean and reuse, adding to the convenience factor.
Draft Brewer® Single Homebrew Kegging System

The Draft Brewer® Single Homebrew Kegging System simplifies the process of setting up your own taproom at home. It comes with a new 5-gallon Cornelius-style ball lock keg and fully assembled gas and draft lines for easy installation. You’ll be able to serve and share your brew within days of receiving the system.
The CO2PO Dual-Gauge CO2 regulator ensures precise carbonation for your beer, with recommended beer style guidelines on the dial face for easy reference. The high-contrast gauges and adjustable pressure knobs provide a user-friendly experience, taking the guesswork out of carbonation. No more worrying about bottle bombs or improper carbonation levels – your beer will be served with the ideal carbonation every time.
LUCKEG Triple Tap Beer Dispenser Tower
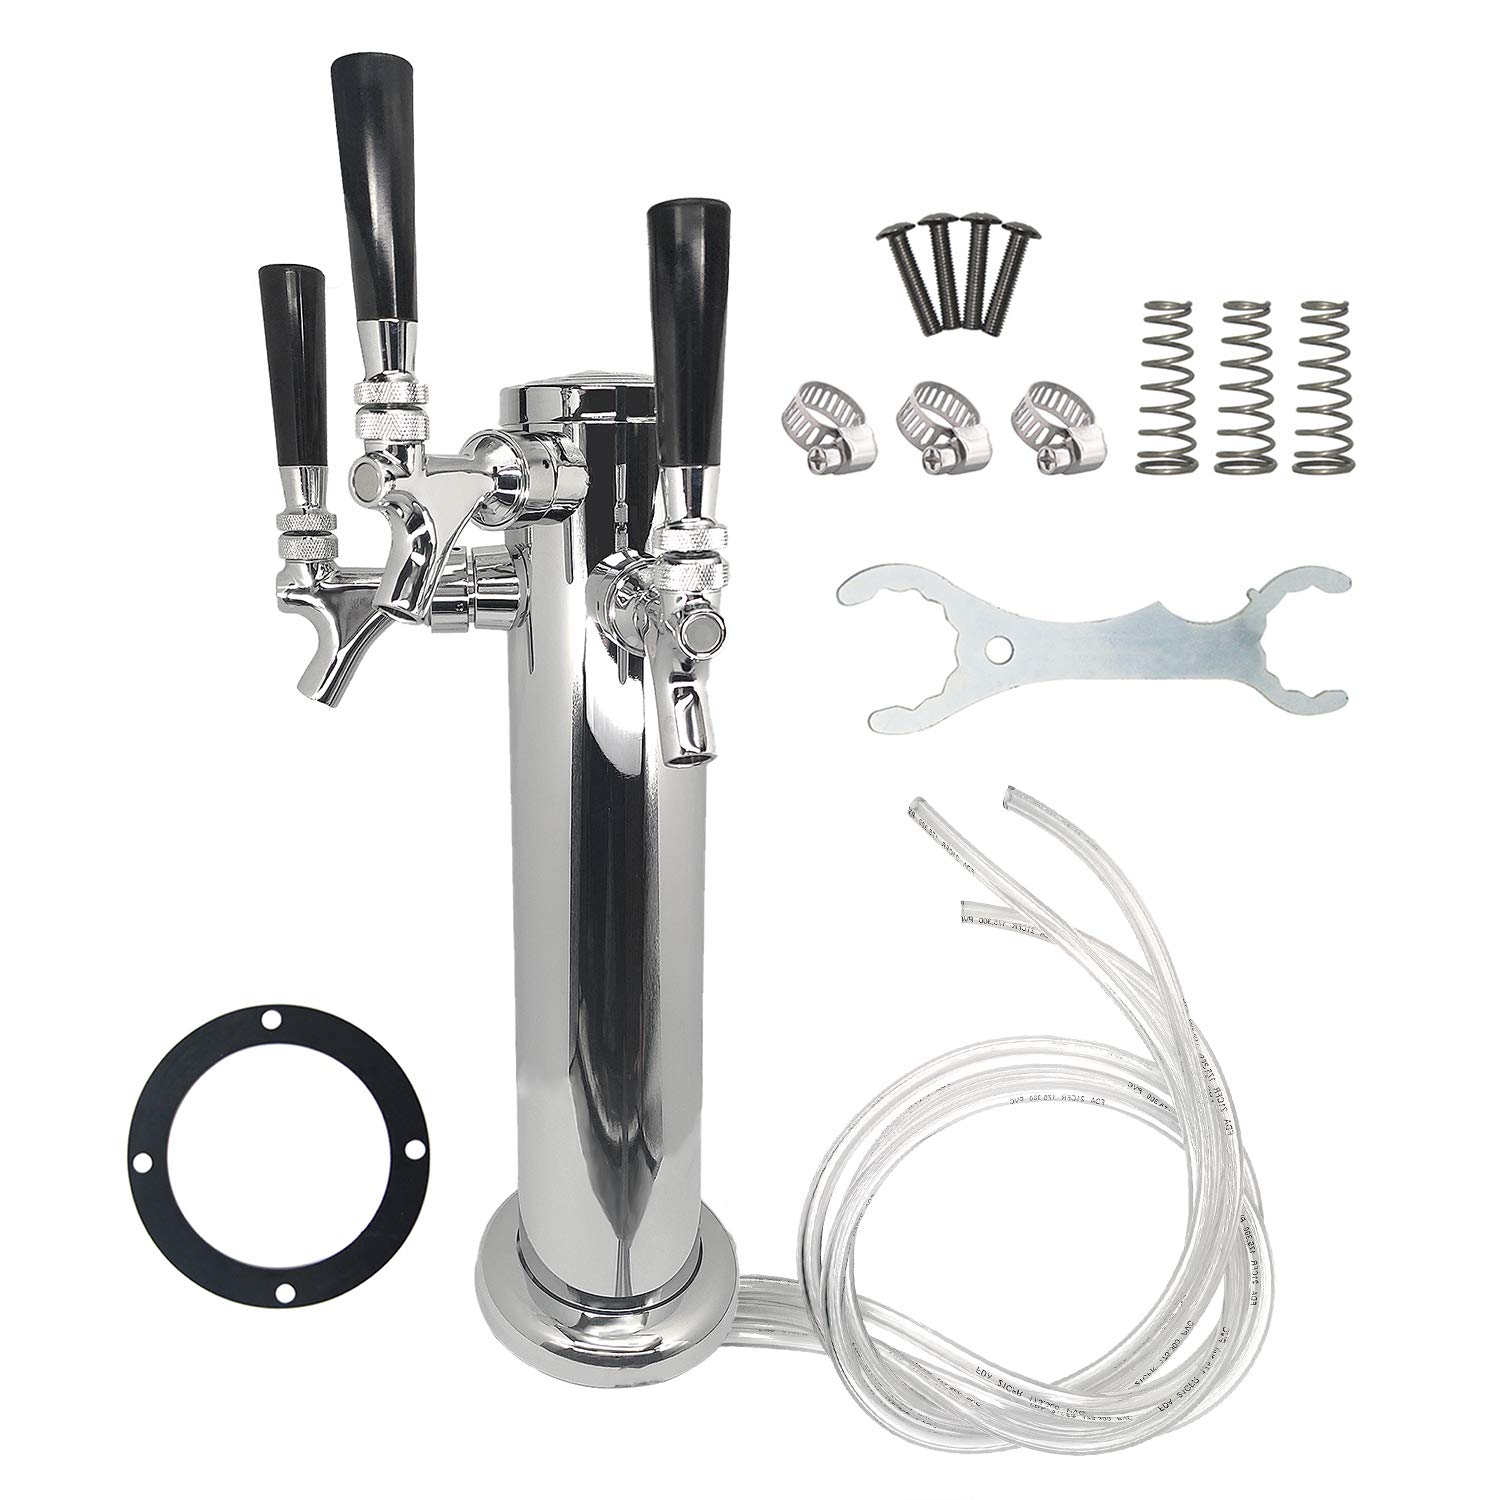
The LUCKEG Triple Tap Beer Dispenser Tower is designed to enhance your home brewing experience by allowing you to serve up to three different beers at a time. With a durable mirror-polished stainless steel body, chrome-plated beer faucet, and PVC material beer hose, this beer tower is built for longevity and ease of use.
Its compatibility with standard kegerator and home brewing systems makes it a versatile choice for beer enthusiasts. The three-faucet design allows you to pour multiple beers simultaneously, making it a time-efficient and economical solution for serving beverages during gatherings or parties.
Kegging Equipment
Kegging your homebrewed beer offers numerous advantages over bottling it, such as convenience, consistent carbonation levels, and the satisfaction of having your beer on tap. To make this process smooth and efficient, it’s essential to have the right kegging equipment. This section will discuss some key components that you’ll need for your kegging system.
A regulator is a crucial piece of equipment that attaches to your CO2 tank, allowing you to precisely control the pressure of the gas entering your keg. By adjusting the pressure, you can achieve the desired level of carbonation in your beer. A high-quality regulator will ensure an even flow and prevent any leaks.
The CO2 tank is the source of carbon dioxide used to carbonate and dispense your beer. These tanks come in various sizes, with the most common capacities being 5, 10, or 20 pounds. The size of the tank you choose will depend on the amount of beer you plan on kegging and how often you plan to refill the tank.
Gas lines connect the regulator to the keg, allowing CO2 to flow from the tank into the keg. It’s essential to use proper gas lines made of food-grade materials to ensure your beer remains uncontaminated.
When it comes to keg connections, there are two common types: ball lock and pin lock. Both systems work similarly, with the main difference being the method of attaching the disconnects to the keg posts. Ball lock kegs use a quick-release mechanism, while pin lock kegs have a more secure pin system. Either option is suitable, but it’s essential to choose the right one to match your kegs.
Disconnects are devices that attach to your keg and provide a connection point for your gas and liquid lines. They come in two types, corresponding to ball lock or pin lock keg systems. Ensure you use the same style of disconnects as your kegs to create a secure connection.
To transfer beer from your fermentation vessel to your keg, a siphon is necessary. A siphon helps to minimize oxygen exposure during the transfer, ensuring your beer remains fresh and free of off-flavors.
Racking is the process of moving your beer from the fermentation vessel into the keg. Using sanitized equipment and proper techniques will help maintain your beer’s quality during this process.
Setting Up Your Kegging System
Whether you’re new to homebrewing or looking for a way to simplify your setup, a kegging system is an efficient way to serve and carbonate your homemade beer. Let’s explore how to set up your kegging system, considering popular options like kegerators, keezers, and temperature control techniques.
To create a functional kegging system, you’ll need a keg, CO2 tank, regulator, beer lines, taps, faucets, quick disconnects, and some tubing for your gas side. Once you have gathered all the necessary equipment, the first step is to disassemble and sanitize your keg. Ensuring cleanliness is crucial to maintain the quality of your homebrew.
After this step, you should prepare your refrigerator or keezer to maintain a consistent temperature for your kegging system. A temperature controller is a great addition, allowing you to achieve an ideal serving temperature around 40°F (4°C). Ensure that the kegerator or keezer is spacious enough to hold the keg and CO2 tank while leaving space for proper air circulation.
Once your keg is sanitized and your cooling system prepared, it’s time to focus on your gas side. Assemble your CO2 tank and regulator, connect them with a gas line, and leak-test the connections. Adjust the regulator to the desired carbonation pressure, typically between 10 and 15 psi, depending on the homebrew style.
Next, set up the serving side by attaching a beer line to the keg’s liquid port. Use quick disconnects to make this process seamless and allow for easy disconnection in the future. The other end of the beer line should be attached to your faucet or tap, which is mounted on the refrigerator or keezer.
At this point, your kegging system should be complete. Remember to purge any residual oxygen by opening the release valve on the keg a few times while pressurized with CO2. Finally, connect both the gas and liquid sides to the keg and store it in the refrigerator or keezer. Your homebrew will reach carbonation within a week, and you’re ready to enjoy the benefits of kegging your beer.
Carbonation Process
The carbonation process is a crucial step in kegging beer as it affects the beer’s taste, mouthfeel, and overall profile. There are two primary methods for carbonating beer in a keg: natural carbonation and force carbonation.
Natural carbonation relies on the residual yeast and sugars present in the beer after fermentation. By adding priming sugar to the keg and sealing it, the residual yeast consumes the added sugar, producing carbon dioxide (CO2) as a byproduct. This CO2 is absorbed by the beer, creating the desired carbonation level over time. Natural carbonation typically takes a few days to a few weeks, depending on factors such as temperature and yeast presence.
Force carbonation, on the other hand, involves injecting pressurized CO2 directly into the keg from a gas cylinder. The CO2 dissolves into the beer, achieving the desired carbonation level quickly and efficiently. This method can significantly reduce the time required for carbonating beer, often taking only hours instead of weeks.
To achieve the correct carbonation level, the desired pounds per square inch (psi) must be determined based on the beer style and temperature. Carbonation charts can be a helpful resource to find the appropriate psi level for a particular style of beer. These charts include recommended psi levels for various beer styles at specific temperatures to guide brewers in achieving the ideal carbonation.
Here are some key points to consider during the carbonation process:
- Cold beer absorbs CO2 more efficiently, which is crucial for both natural and force carbonation methods.
- Monitor and adjust the psi level according to the carbonation chart to achieve the desired carbonation level for the beer style.
- Natural carbonation is a traditional method that demands patience, while force carbonation offers a faster and more controlled process.
- Ensure proper sanitation during kegging to avoid contamination and off-flavors in the finished beer.
Cleaning and Sanitizing
Cleaning and sanitizing are crucial steps for brewers when kegging beer. Ensuring a clean and sanitary environment helps preserve the taste and quality of the beer. It also reduces the risk of contamination that can spoil a batch of homebrew.
To clean a beer keg, begin by disassembling the keg and removing all the components. Soak the fittings in a solution of acid cleaner once a week to keep them bright and free of beer scales. Rinse the parts with fresh water after soaking them in the solution. For kegs and parts made from soft metals, such as aluminum, use a phosphoric acid-based product instead of nitric acid to descale the kegs and their parts.
The surface of the keg can be cleaned with hot water, while the inside should be treated with an appropriate cleaning solution. One popular option is Powdered Brewery Wash (PBW), which can effectively remove grime and buildup within the keg. Create a solution by combining PBW and hot water, then pour it into the keg. The keg should be soaked for a while, according to the product’s instructions, and then rinsed thoroughly.
Sanitizing the keg is the next step in the process. It is essential to use an effective sanitizer to eliminate any remaining microorganisms. A popular choice among homebrewers is iodophor, a no-rinse sanitizer that is both effective and easy to use. Simply follow the manufacturer’s instructions regarding dilution ratios and contact time. Another option is a sanitizer called Star San, which is also a no-rinse solution.
Brewers should ensure that all keg components, such as valves and tubing, are also sanitized. Soaking these parts in the sanitizing solution and allowing them to air dry can help ensure that the entire kegging system is prepared for beer storage and dispensing.
Finally, it’s essential to develop a consistent cleaning and sanitizing routine. By establishing a schedule and adhering to best practices, brewers can ensure their beer kegging experience will yield the best results. Always remember that cleanliness and sanitation play a critical role in preserving the quality of your beer and are necessary for maintaining your brewing equipment’s longevity.
Maintaining Your Kegging System
Keeping your kegging system in optimal condition is essential for preserving the quality of your beer and ensuring efficient operation. Regular maintenance of all components, including o-rings, small parts, handles, regulators, distributors, and fermentors, is crucial.
O-rings and other small parts require special attention, as they are responsible for sealing connections and preventing leaks. They should be inspected periodically for wear and tear, and replaced as necessary. When handling o-rings, apply a thin layer of keg lubricant to extend their lifespan and improve sealing capabilities.
The handle of your keg should be checked for any damage or loosening. A secure handle ensures safe transporting and prevents accidental spills. If the handle appears weak or damaged, consider replacing it immediately.
Regulators and distributors play an important role in managing your beer’s carbonation levels. Make sure to clean and inspect these components regularly. For regulators, keep an eye on any unusual readings and test for any leaks using a soapy solution. Distributors should be cleaned periodically to prevent the buildup of beer residue, which can lead to bacterial growth and off-flavors in your brew.
The fermentor, where your beer is initially brewed, must also be maintained properly. Clean and sanitize it after each use to prevent contamination and ensure consistent brewing results. Conduct periodic checks for scratches or damage on the interior surfaces, as these can harbor bacteria and spoil your beer.
Remember to store your CO2 tank upright and maintain a consistent temperature for your kegging system. This will help keep your beer carbonated and preserve its quality for an extended period. By following these maintenance tips for your kegging system, you can enjoy fresh, well-carbonated beer at home with confidence.
Tap and Faucet Basics
Tapping a keg and dispensing beer require the use of a tap and a faucet. These components of a kegging system play a crucial role in controlling and serving pressurized beer.
A tap is an essential part of a kegging system that connects to the keg and allows the flow of beer. Taps typically use quick disconnects, making them easy to attach and remove from the keg. There are different types of taps, including party pumps and CO2 taps. Party pumps rely on manual pumping to pressurize the keg, while CO2 taps use a CO2 gas tank and pressure regulator to provide precise control of serving pressure.
The faucet is the component that controls the flow of beer when serving. Faucets can vary in design and function, with some options being more suitable for specific types of beer or serving situations. The simplest and most affordable option is the picnic tap, a handheld faucet suitable for casual events. For a more permanent setup, consider a faucet with a tap handle, which can be installed on a kegerator or jockey box.
When setting up a kegging system, ensuring the appropriate serving pressure is crucial. The serving pressure depends on the type of beer, temperature, and desired carbonation level. Most ales are best served at a pressure of 10-12 PSI (pounds per square inch), while lagers often require a higher pressure of 12-14 PSI. Consult the guidelines for the specific beer you’re serving to determine the optimal pressure.
Troubleshooting and Common Issues
When kegging beer, several issues can arise, requiring troubleshooting to ensure a smooth and enjoyable experience. This section will discuss some common issues and provide tips to address them.
One common issue is the presence of sediment in the beer. This can be caused by excess hop material, dead yeast, or other beer adjuncts accumulated at the bottom of the keg where the dip tube pulls the beverage. To mitigate this issue, ensure proper filtration and allow the kegged beer to settle before serving. Subsequent pours should be clearer.
Both Cornelius kegs and pin lock kegs have their own sets of potential problems. For Cornelius kegs, a common issue is leakage caused by worn or damaged O-rings. Regularly inspect and replace O-rings as needed to maintain a tight seal. In pin lock kegs, make sure the pins are correctly aligned and engaged to avoid connection problems.
Ball lock kegs are another popular choice, but they can experience issues with gas and liquid post connections. Ensure the posts are in good condition and replace any damaged or worn parts. Use appropriate connections and make sure they are correctly seated and tightened.
Keeping the keg system clean and sanitized is crucial. Use a suitable cleanser and follow the manufacturer’s recommendations for cleaning frequency. Regular cleaning prevents potential off-flavors and contamination from affecting the beer.
Foamy beer can be caused by a variety of factors, such as incorrect temperature, faucet issues, or pressure imbalances. To solve this issue, check that the refrigerator’s temperature is maintained at 36°F or higher, ensure the faucet is fully opened, and adjust the CO2 pressure as necessary.
Draft Beer and the Beverage Industry
Draft beer, also known as keg beer, has long been a significant part of the beverage industry. Stored in kegs or casks, draft beer offers a fresher taste when compared to its bottled or canned counterparts. The invention of the beer engine by Joseph Braham in 1785 revolutionized the way beer was transported and served, with the term “draft” originating from the old English word “dragan,” meaning “to carry or pull.”
The chemistry behind draft beer plays a crucial role in maintaining its quality and freshness. Proper carbonation levels, microbiological stability, and natural aging of the beer all contribute to its desirable taste and longevity. Serving draft beer usually involves pouring 14.5 ounces of beer into a 16-ounce glass, with the remaining space occupied by a head roughly the height of a dime.
In the past, draft beer accounted for 10% of the total beer market volume in the United States. However, due to the widespread closure of on-premise retail establishments, like bars, restaurants, and event venues, the volume dropped to 6% in 2020. Despite this decline, draft beer remains a popular choice for consumers who prefer its taste and freshness over other forms of beer.
One of the key advantages of keg beer lies in its eco-friendliness. Stainless steel kegs can be reused for decades, significantly reducing the amount of waste that reaches landfills compared to bottles and cans. The draft beer keg has a service life of 30 years or more, with each keg capable of serving an average of 165 (12-ounce) bottles/cans per year. Over its lifetime, a single keg can make a considerable impact on reducing waste.
Transitioning from Bottling
When shifting from bottling to kegging in homebrewing, there are a few crucial steps and considerations to ensure a smooth and successful transition. This process not only reduces the time and effort involved in bottling but also provides more control over carbonation levels and makes serving homebrewed beer more convenient.
The first step in the transition is acquiring the necessary equipment. Key items needed include: a keg, a regulator, a gas tank (typically CO2), CO2 lines, a faucet, and a filling device, such as a counter-pressure keg filler or a beer gun. Investing in quality equipment will simplify the kegging process and improve your overall homebrewing experience.
Next, it’s important to thoroughly clean and sanitize all equipment before use. Kegs should be disassembled and their components cleaned, with special attention given to the dip tube, posts, and seals. Sanitization will help prevent any potential contamination issues and ensure your beer remains fresh and enjoyable.
Once the equipment is clean and ready, it’s time to transfer your beer from your fermenter to the keg. This can be done using a siphon or an auto-siphon, with minimal splashing to reduce the risk of oxidation. Make sure to purge the keg with CO2 before filling to remove any oxygen from the keg and maintain beer quality.
After transferring the beer, it’s essential to properly set the regulator pressure for carbonating your homebrew. Unlike priming with sugars during bottling, kegging allows you to control the carbonation level with precision. Familiarize yourself with your specific regulator and consider using a carbonation chart to help determine the appropriate pressure for your desired carbonation level based on the beer style, temperature, and personal preference.
Lastly, allow the beer to carbonate for several days, cooling it down to serving temperature and periodically checking the carbonation levels. With a bit of patience, you’ll soon be able to enjoy a perfectly carbonated, homebrewed beer directly from your keg system.
Frequently Asked Questions
How is beer carbonated in a keg?
Beer is carbonated in a keg by injecting CO2 into the sealed container, where the gas dissolves into the liquid. The pressure inside the keg ensures that the CO2 remains dissolved, creating a fizzy, carbonated beer. There are two main methods for keg carbonation: force carbonation and natural carbonation. Force carbonation involves directly injecting CO2 into the keg, while natural carbonation uses the CO2 produced during fermentation.
What equipment is needed for kegging?
The basic equipment needed for kegging includes a keg, CO2 tank, regulator, hoses, and a faucet or tap to dispense the beer. You may also require a temperature-controlled environment, such as a refrigerator or kegerator, to store the keg at the ideal serving temperature.
When is beer ready after kegging?
After kegging, beer typically needs 1-2 weeks to properly carbonate and condition. However, this can vary depending on factors such as temperature and the specific beer style being brewed. Some beers may be ready in just a few days, while others may take several weeks.
What are the benefits of kegging vs bottling?
Kegging offers several advantages over bottling, such as reduced time and effort, easier carbonation control, and better consistency. Kegging eliminates the need to clean, sanitize, and fill individual bottles, making it a more efficient process. Additionally, kegging allows for precise control over carbonation levels and provides consistent beer quality, while bottling can sometimes result in uneven carbonation or oxidation.
What is the process of kegging beer?
The process of kegging beer involves several steps. First, clean and sanitize the keg and its components. Then, transfer the beer from the fermenter into the keg, taking care to minimize exposure to air. Seal the keg and connect it to the CO2 tank, using a regulator to control the gas pressure. Allow the beer to carbonate at the desired pressure and temperature for the recommended time. Lastly, store the keg at serving temperature and connect it to the faucet or tap for dispensing.
How to choose the best kegging system?
To choose the best kegging system, consider factors such as your brewing volume, available space, budget, and personal preferences. Smaller batches may be suited for Cornelius or “Corny” kegs, while larger batches may require sanke kegs. Ensure that your CO2 tank size is appropriate for your kegging needs, and consider the overall cost and quality of the components. Comparing different kegging systems and reading reviews from fellow homebrewers can also help you make an informed decision.